FSRT Documentation for Fire Restoration Jobs: Subrogation, Spoliation, and Evidence Preservation

Learn FSRT fire restoration documentation, evidence handling, subrogation basics, and spoliation awareness. Build a claim-ready job file.
Aug 13 / RestoreTech 360

Key Takeaways

Strong fire restoration documentation protects the customer, the contractor, and the claim by preserving what happened and what you did. If your notes and photos are clear, you can answer questions later without guessing or relying on memory.

Spoliation risk increases when evidence is altered or discarded, so technicians need a simple, repeatable preservation workflow. If you do one thing, do this: treat anything that could explain cause, origin, or spread as evidence until you confirm otherwise.

Subrogation outcomes often depend on what you captured early and how well you kept it organized. Prioritize:

  • Early photos of affected areas, appliances, and suspected sources

  • Time-stamped notes on what you observed and what actions you took

  • Basic chain of custody records when items are removed or stored

  • A clear job file that connects decisions, approvals, and daily progress

When your job file becomes the story of the loss

Next, picture this: you’re in a live demo for the adjuster and a critical component gets pulled out so everyone can “see what’s going on.” Two weeks later, someone asks what failed first and why, and the only thing that can answer confidently is your job file.

A measured target that holds up under pressure is to complete initial documentation within the first 30–60 minutes on site, then add short daily updates. If you do one thing, do that first hour well, because it sets the timeline, locks in what was present, and reduces back-and-forth later.

So here’s a practical, FSRT-aligned checklist you can run on every fire restoration loss to document, preserve, and communicate evidence without guessing.

  • Start a timeline immediately

    • Record arrival time, weather, power status, and who is on site

    • Note the last known normal and discovery time if available

  • Capture the scene before you move anything

    • Wide photos of each room, then mid-range, then close-ups

    • Include labels, model numbers, serial numbers, and shutoff positions when visible

  • Describe conditions in plain language

    • What you see, smell, and hear (soot pattern, heat damage, arcing marks, unusual odors)

    • What is wet vs dry, what is intact vs disturbed

  • Flag anything that could become evidence

    • Components that appear failed, melted, tripped, or altered

    • Items removed during demo, inspection, or teardown

  • Preserve without stopping production

    • Bag and label small parts with date/time, location, and handler name

    • Store larger items in a clearly marked, access-controlled area

  • Communicate the same day

    • Send a short update to the right parties: what changed, what was removed, where it is now

    • State unknowns clearly (works best when you stick to observations, fails when you imply cause)

  • Close each day with a two-minute log

    • What actions were taken, by whom, and why

    • What evidence is now secured, and what still needs review

Common mistake: taking great photos but not tying them to a location and a time. Fix: use a consistent naming pattern (room, direction, subject) and add a one-line note for any photo that shows an item being moved or removed.

Document the loss like it may be reviewed months later

Next, assume someone who was not on site will read your file months later and try to understand what happened from scratch. If the file cannot explain the story of the loss in 10 minutes, it is probably missing basics that matter in subrogation and evidence preservation.

If you do one thing, do this: write the fundamentals in plain language the same day you observe them. Memory fades fast after a busy production week, and small details like the first odor location or the first photo angle can be hard to recreate later.

Capture the fundamentals every time

Also, document the same core facts on every job, even when the cause seems obvious. A consistent set of basics makes your notes readable to the PM, estimator, adjuster, and a third-party reviewer who only sees what is in the file.

Use a quick checklist to keep it consistent:

  • Who: crew members on site, primary contact, and who gave access

  • What: what was damaged, what was wet or dry, and what was already removed

  • When: first notice of loss, first site visit time, and key action times like pack-out start

  • Where: room names, levels, and the exact area of origin or worst impact if known

  • How you found it: what you saw, smelled, and measured on arrival

  • What you changed: any demolition, cleaning, drying setup, or content handling you performed

Common mistake: only writing what you did, not what you saw before you touched anything. Fix it by adding a short "arrival snapshot" note before listing production actions.

Build a consistent job file with a clear timeline

So, think of your file as one folder that can stand on its own without extra calls, texts, or tribal knowledge. A clean timeline plus supporting artifacts is what turns scattered documentation into a defensible record.

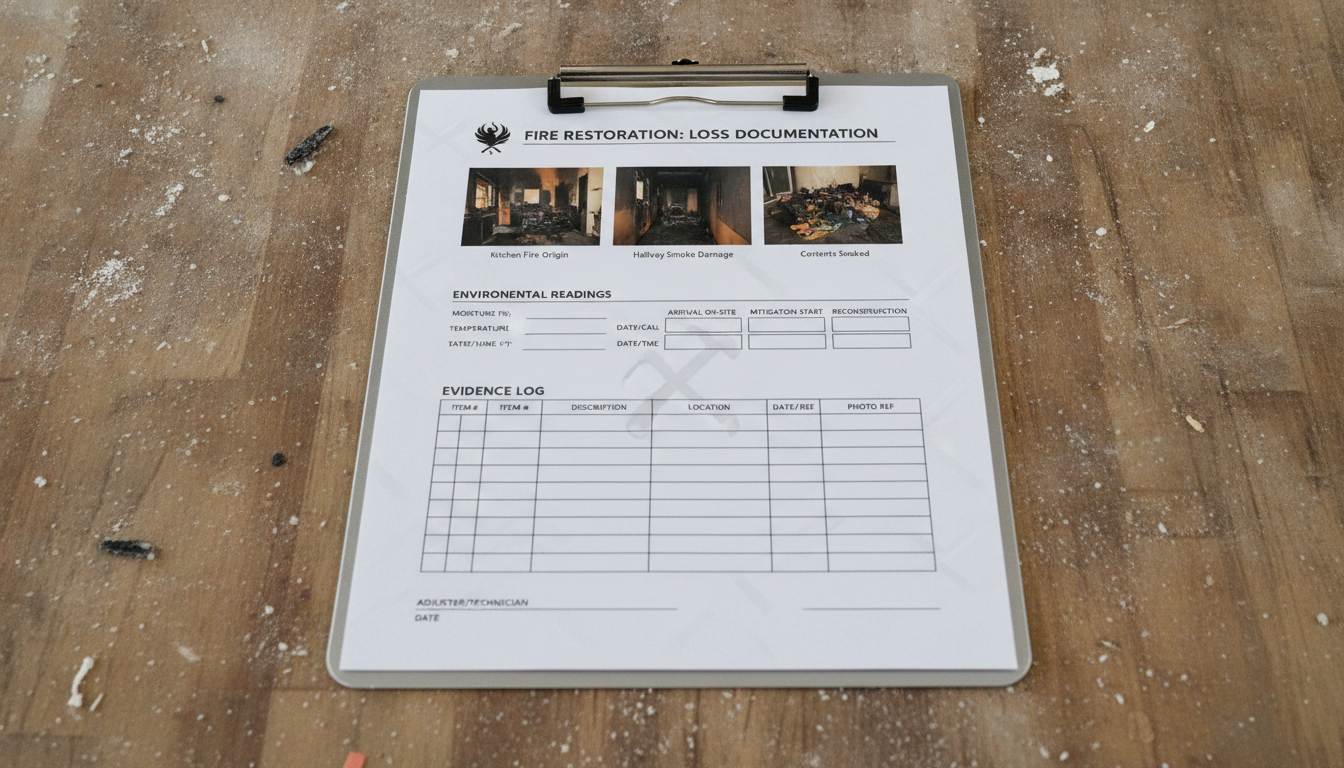
Aim for one running timeline that ties everything together:

  • Photos: wide shots first, then mid-range, then close-ups with a reference point like a tape measure

  • Notes: dated entries for each visit, including what changed since the last visit

  • Readings: moisture readings, humidity, temperature, and where each was taken

  • Sketches: a simple room diagram showing equipment placement and measurement points

  • Communications: summaries of key calls and approvals, plus any change requests

  • Timeline: a single chronological list of events like inspection, stabilizing actions, removal, cleaning, and monitoring

Tradeoff: detailed documentation works best when it is captured in small chunks during the day, but it fails when you wait until end of week and try to backfill from memory. If you are short on time, skip long paragraphs and record a tight timeline with 6 to 10 bullets, then add photos and readings that match each timestamp.

Preserve evidence without stopping production

Next, treat evidence like a limited resource: once it is moved, cleaned, or discarded, it may be gone for good. You can keep production moving by flagging likely evidence early and setting up a simple, repeatable way to secure it.

If you do one thing, do this: identify and isolate first, then document, then move. The common mistake is to start demo and bag “debris” before anyone has marked what might matter, which can create avoidable disputes later.

Identify potential evidence early (what to look for)

In practice, your first walkthrough is when you have the clearest picture of what looks original, what looks altered, and what looks like a heat source. You do not need to decide the cause, you just need to recognize what could support it.

Start by flagging items and patterns such as:

  • Ignition area indicators like the tightest burn, deepest char, or most concentrated melt

  • Appliances and connected parts: cords, plugs, outlet faces, power strips, breaker labels

  • Wiring, junction boxes, and any splices that look recent or out of place

  • Batteries, chargers, e-bike or tool battery packs, and charging stations

  • Patterned damage like V-patterns, low burn, clean burn, or unusual directional soot

  • Items that were moved after the incident, such as fans, heaters, or extension cords

Works best when someone does this before heavy cleaning or demolition starts. Fails when a crew tears out a kitchen wall in the first hour and the outlet, cord, and device are all mixed into one debris pile.

Use a simple chain of custody you can run in 5 minutes

So keep the process simple enough that a PM, lead tech, or contents lead can do it consistently. If you are short on time, skip detailed narration and focus on 10 clear photos plus a clean log entry.

A basic chain of custody can be:

  • Label: assign an evidence ID (for example, “E-003”) and write the location it came from (room, wall, height)

  • Bag: use a clean bag/box, keep parts together, and avoid over-handling

  • Secure: place in a designated locked bin or a taped-off shelf that is not used for daily debris

  • Log transfers: record who collected it, who moved it, when, and why

  • Document condition before moving: photos of all sides, close-ups of connections, and a ruler or tape measure in at least one frame

For example, if a technician finds a melted charger near a bedroom outlet at 9:20 a.m., they can photo it in place, mark it, bag it, and log the transfer to the PM before noon, while the rest of the crew continues dry-out and containment. That small habit protects the job file without stopping production.

Keep subrogation and spoliation risks high-level but front of mind

So once you’re preserving evidence while keeping the job moving, you also need a simple working awareness of two legal concepts that show up later.

Educational, not legal advice: Subrogation is when an insurer seeks to recover money from a responsible party after paying a claim. Spoliation is when relevant evidence is lost, destroyed, or changed in a way that makes it harder to evaluate what happened. Technicians can affect both because everyday production decisions, like what you remove, clean, bag, or discard, can change what an investigator can prove months later.

Here’s why this matters in plain terms: if your file does not show what the scene looked like before work started, or if key items are altered without a clear record, you may not have a defensible explanation later. That can create avoidable disputes, even when the restoration work was correct and necessary.

A practical do and don’t list for technicians

Next, treat this like a quick checklist you can follow in the moment.

Do

  • Take pre-work photos before you move items, even if it is just 2 to 3 minutes of wide shots

  • Keep a simple timeline note: who arrived, what was observed, what actions started, and when

  • Set aside and label potential evidence items when reasonable (for example, a failed appliance part, breaker, or suspect device), then notify your supervisor

  • Document unavoidable changes with before and after photos (for example, removing a charred cabinet to access wet framing)

  • Escalate concerns promptly when you spot anything that seems like a cause item, unusual burn pattern, or tampering

Don’t

  • Throw away potential cause items “to clean up” without approval and documentation

  • Over-clean or aggressively scrape soot from areas that may show patterns (works best to clean after initial documentation; fails when cleaning removes the only visible indicators)

  • Combine debris from different rooms into one bag without labeling where it came from

  • Make causal statements in notes (write what you saw and did, not why you think it happened)

If you do one thing, do this: document first, then change the scene only as much as production requires, and record every unavoidable change as you go.

Closing remarks

So when the dust settles and the crews are gone, your job file is what speaks for you.

If it isn’t documented, it didn’t happen and if it isn’t preserved, it can’t be proven. That idea is less about paperwork and more about protecting your team, the client, and any future review that happens 60 or 120 days later.

Pick one improvement you can standardize this week, then make it boring and repeatable:

  • Photos: define a minimum set (exterior, origin area, affected rooms, contents, meters, labels) and a naming rule tied to date and room

  • Timelines: require a same-day note for what changed on site (water shutoff, demo start, drying start, containments, equipment moves) with who approved it

  • Evidence handling: set a rule for what gets bagged or boxed, how it gets labeled, where it’s stored, and who signs off before anything is discarded

If you do one thing, do the photo standard first because it usually takes the least time on site and it clears up the most arguments later. If you are short on time, skip long narratives and capture the critical before, during, and after photos plus a simple timeline entry for the day.

The common mistake is treating documentation as an end-of-job task. Fix it by building a five-minute habit at the end of each site visit so the record stays current while details are still fresh.

Explore training that supports FSRT job-file skills