Why Building Material Identification Matters in Water, Fire, and Mold Restoration

Aug 13 / RestoreTech 360

Key Takeaways

  • Accurate building material identification reduces rework by aligning drying, remediation, and documentation decisions to real assemblies

  • Construction era and material characteristics often determine salvage versus replacement more than visible damage alone

  • Consistent documentation protects the technician, supports estimates, and improves communication with carriers and stakeholders

When one wrong material call turns a routine job into a comeback

You walk a bathroom loss and see a damp wall, so you write it up as “wet drywall,” set air movers, and plan for a quick dry-out. Two days later the meter still reads high, the base swells, and the homeowner says the musty smell is getting worse. What looked routine becomes a return trip, a revised scope, and a tougher conversation.

A big reason is that the same “wet wall” can be different systems: modern gypsum drywall, plaster over lath, or gypsum board with tile backer in patches. Each one takes on water differently, dries at a different pace, and changes what you can reasonably salvage.

Also, small misidentifications can cost you 1–2 extra drying days, multiple return trips, or unnecessary demolition. Drywall might be a clean flood cut and fast drying, while plaster can hold moisture deep in the assembly and give you misleading surface readings. Lath-and-plaster can also hide voids, irregular thickness, and older finishes that change how heat, air, and dehumidification behave.

If you do one thing on the first visit, make it this: confirm what the wall is before you commit to the drying plan and the scope.

A repeatable “wet wall” checklist you can run in 5 minutes

Next, use a simple check that works in apartments, older homes, and light commercial restrooms. It is fast enough to do while you are already taking photos and setting containment.

  • Check accessible edges first (return air grille cutout, vanity cutout, baseboard removal spot)

  • Look for paper facing and uniform gypsum core (typical drywall)

  • Look for hard, gritty surface with thicker build and no paper (plaster)

  • Look for wood lath strips or wire mesh behind the plaster (lath-and-plaster)

  • Compare readings: take one “known dry” control reading in a nearby unaffected area, then map 3–5 readings up the wall

  • Make one small inspection opening only when it changes the plan (for example behind a toilet supply line leak where tile stops)

  • Document the call in one sentence in your notes (material and why) so the next tech stays consistent

But this checklist has tradeoffs. It works best when you can access an edge or penetration, and when finishes let you see the substrate. It can fail when walls are fully tiled, double-layered, or recently patched with mixed materials, so you may need a targeted inspection hole instead of guessing.

If you’re short on time, skip the full wall map and do two things: one control reading and one edge confirmation. That alone prevents the common mistake of treating plaster like drywall, which often leads to under-drying, odor callbacks, or tearing out more than you needed.

Identify materials and assemblies fast without guessing

Next, move from “what it looks like” to “what it is” using quick field cues you can check in under 2 minutes per area. The goal is to confirm the material and the assembly (what layers are working together) before you write drying goals, set containment, or promise a timeline.

If you do one thing, do this: match at least three cues before you label a material in notes or photos. Works best when the finish is exposed and accessible; fails when everything is wrapped in paint, heavy texture, or coverings, so you may need to confirm at an edge or opening.

Field cues you can trust on site

Also, use a repeatable checklist so two techs looking at the same wall reach the same call. Start with what you can see, then confirm at a safe edge or penetration.

  • Surface finish: glossy paint, orange peel texture, veneer grain, cement skim, vinyl wear layer

  • Thickness: compare to known references (coin, key, tape measure on an exposed edge)

  • Fasteners: nail pattern, screw spacing, staples at edges, trim nails into baseboard

  • Backing: paper facing, mesh, foam board, metal lath, wood sheathing behind a thin layer

  • Panel edges: factory bevel, square cut, tongue-and-groove, crumbling plaster edge vs clean gypsum snap

  • Simple non-destructive checks: tap tone changes, magnet for metal corner bead or lath, look behind outlet covers or return grills, inspect unfinished sides (closets, utility rooms)

Common mistake: calling something “drywall” based only on a painted surface. Fix: verify by finding an edge at a baseboard gap, an access panel, or inside a cabinet kick, then note the facing and core.

Assemblies that cause the most confusion

But materials rarely sit alone, and the assembly is what drives drying time, cleaning approach, and what can be saved. These setups are easy to misread when you only see the top layer.

  • Multi-layer floors: LVP over underlayment over OSB, tile over cement board, hardwood over sleepers, carpet over pad

  • Insulated exterior walls: drywall over studs with batt insulation, foam board with furring strips, vapor retarder films that hold moisture

  • Plaster systems: veneer plaster over blue board, traditional plaster over wood or metal lath, patch areas that hide transitions

  • Drop ceilings: mineral fiber tiles, fiberglass tiles, foil-faced panels, grid corrosion after category water

  • Adhered finishes: glued-down carpet, direct-adhered VCT, fully adhered wallpaper, thin brick veneer

Here’s the catch: a single visible cue can be misleading, like “tile floor” that is actually tile over cement board over OSB, which changes how you set air movement and what you can dry from below. If you’re short on time, skip “perfect naming” and do this instead: document the layer order you can confirm (top layer, underlayment, subfloor or sheathing), plus one photo at an edge or opening.

Use building age and construction differences to predict what’s behind the surface

Next, stop treating every wall and ceiling like it was built the same year. A quick age estimate changes what you expect behind the finish, what tools you bring, and how much you open up before you hit a surprise layer.

If you do one thing, do this: tie your first inspection notes to a rough era (pre-1950, 1950 to 1980, 1980 to 2000, 2000 and newer). It takes 30 seconds and often prevents a 3-hour rework when the assembly is not what you assumed.

Era-based expectations that help you plan your opening and drying path

Also, use the building’s “typical” system for that era as your baseline, then verify with a small test opening.

  • Pre-1950: plaster over wood lath, thicker walls, more air gaps, harder to patch cleanly and slower to dry through the finish

  • Post-war to late 1970s: gypsum board becomes common, faster to demo and patch, but you may see early vapor control attempts in exterior walls

  • 1980 to 2000: more insulation, more plastic films, more sealed cavities that trap moisture where you cannot see it

  • 2000 and newer: engineered wood products and newer finishes that can swell, delaminate, or stain quickly after a clean-water loss

Tradeoff to remember: plaster often tolerates brief wetting but hides moisture in multiple layers, while modern paper-faced gypsum shows damage sooner but is easier to isolate and replace cleanly.

Red flags that should change your plan before you cut, heat, or sand

But certain details should immediately make you slow down and adjust your approach, because they affect drying, containment, and what “clean” looks like after fire or mold.

  • Vapor barriers or plastic sheeting: expect trapped moisture and plan for targeted openings at the bottom and top of cavities

  • Foil-faced insulation: moisture and heat behave differently, and readings can be misleading near foil, so confirm with a second method

  • Multiple paint layers: higher chance of poor adhesion, hidden cracks, and messy feathering during repairs

  • Previous remodels: mixed substrates in one room (for example plaster patched with gypsum) that require different removal and drying decisions

  • Mixed-material transitions: tile-to-drywall, plaster-to-wood paneling, or old-to-new additions where gaps and voids collect smoke residue or mold growth

Common mistake and fix: crews cut one “standard” flood cut height across the whole level. Fix it by changing heights by room based on red flags, and by making one small exploratory opening first when the assembly is likely mixed.

Make better salvage vs replacement decisions across water, fire, and mold

Next, turn what you identified into a clear yes or no call: can this material and assembly realistically be dried or cleaned, or should it be removed. The goal is not perfection, it is a defensible decision that keeps drying timelines, health risk, and rework under control.

If you do one thing, do this: decide based on the whole assembly, not just the surface. A painted drywall face can look fine while insulation behind it stays wet, or a cabinet toe-kick can look dry while the sink base remains contaminated.

Water: porosity and assembly complexity drive drying choices

Also, porosity tells you how water behaves and what “dry” can realistically mean. Non-porous finishes like glazed tile or sealed metal usually release moisture faster, while porous materials like gypsum, wood, and cellulose-based products can hold moisture deep inside. Drying often works best when the material is accessible and airflow can reach wet layers, and it tends to fail when moisture is trapped behind multiple layers.

Common mistake: placing air movers based on room size instead of wet assembly shape. Fix it by matching equipment to the wet footprint and the likely path of trapped moisture.

  • Low complexity assemblies (example: one layer of drywall on studs, wet for less than a day) often support targeted drying with 2 to 4 air movers and a dehumidifier sized to the space

  • High complexity assemblies (example: double drywall, foam board, brick veneer, or a built-in bench) often need selective removal to create access, even if the surface looks acceptable

  • If you're short on time, skip arguing over “dry enough” by feel and get numbers: baseline comparisons, moisture mapping, and a clear drying goal for each material type

Fire and mold: composition determines cleaning vs removal and what comes next

But fire and mold push you into a different decision tree: what is the material made of, and can it be cleaned without leaving residue or odor. Dense, non-porous materials (glass, many metals, some plastics) often clean well, while porous and fibrous materials (unfinished wood, drywall paper, insulation, carpet pad, acoustic tile) are more likely to hold soot particles or microbial growth that is hard to verify.

Here’s the catch: cleaning is only the right call when you can verify the result. If the job requires heavy agitation that damages the substrate, or you cannot access the back side of a porous material, removal may be the safer and faster path.

  • Antimicrobials work best on cleanable, non-porous surfaces after soil is removed, and they fail when used as a shortcut over visible growth or wet, porous materials

  • Containment scope should match the risk of spreading particulate or spores during demolition and cleaning, not the room label on the work order

  • Plan verification early: what you will inspect, what you will measure, and what “pass” looks like before you choose cleaning vs removal

Documenting the decision so it holds up later

So, treat documentation as part of the technical work, not admin. A salvage decision without notes becomes hard to defend when a stakeholder asks why a material stayed, why drying took three days, or why odor returned two weeks later.

Use a simple, repeatable record that ties conditions to actions.

  • Photos: wide shots for context plus close-ups of staining, warping, soot loading, and visible growth

  • Measurements: material readings and ambient conditions at the same times each day, plus what you used as the comparison point

  • Moisture mapping notes: a quick sketch or grid showing wet-to-dry transitions and any isolated “hot spots”

  • Observed assembly: what layers you confirmed (for example, drywall over plaster, vinyl over underlayment, cabinet base over particleboard)

  • Rationale: why you chose drying, cleaning, or removal, including constraints like access, time since loss, and complexity

  • Stakeholder message: what you told the adjuster, property manager, or homeowner about expectations, risks, and next steps

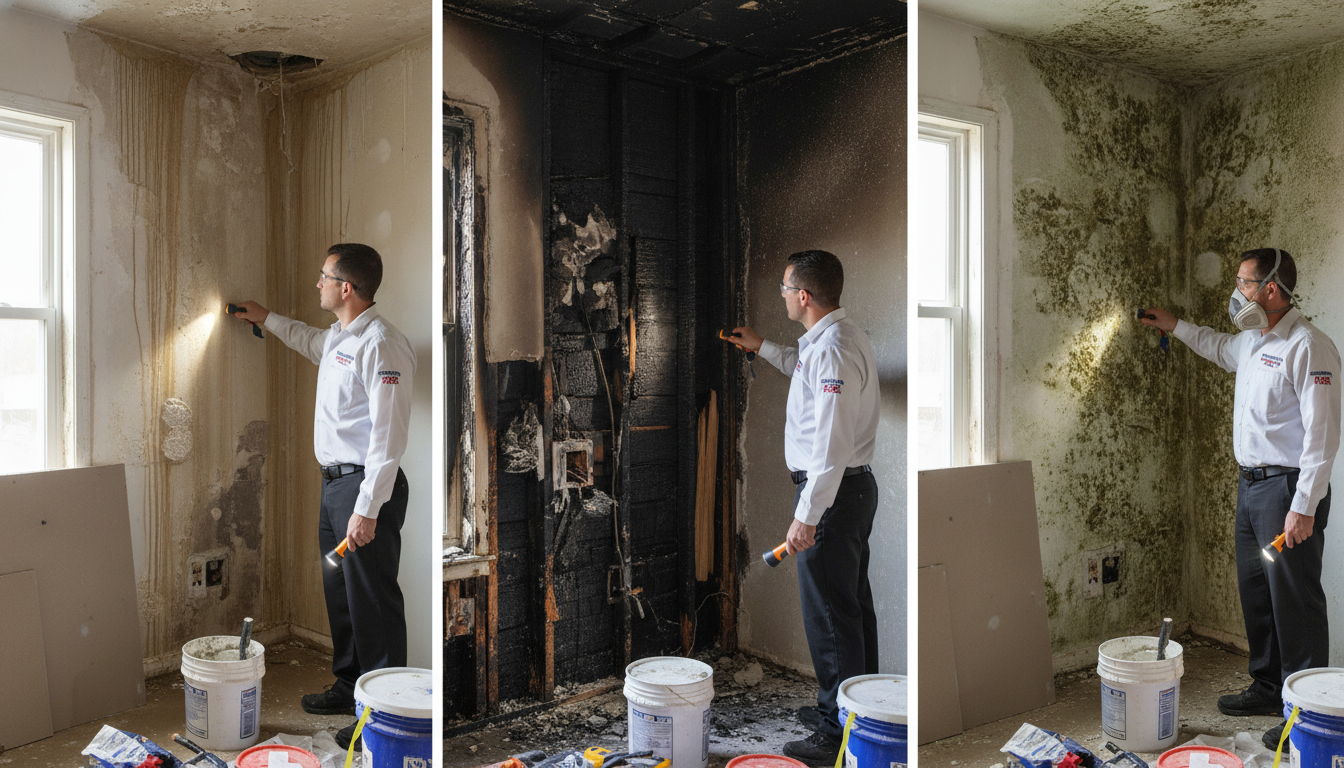
Closing remarks

“What you don’t identify, you can’t justify.”

That line matters in restoration because your documentation needs to match the reality behind the surface, not the story you told yourself at first glance. When you can name the material and the assembly, your drying plan, cleaning approach, and scope decisions become easier to explain to a PM, adjuster, or homeowner.

So here’s a simple question to carry into your next walkthrough: which material or assembly do you most often assume without confirming. Is it plaster vs drywall, a double layer of gypsum, glued down flooring over underlayment, or insulation type in an exterior wall.

If you do one thing, do this: pick one assumption and replace it with one quick verification step.

  • Press test or probe at a non-finish edge before you write “drywall”

  • Check thickness at an outlet cutout before you order a patch

  • Lift one threshold or baseboard segment to confirm the floor build-up

  • Note the building age and one visible clue, then compare it to what you found

That said, verification works best when you do it early, before demo, drying equipment placement, or containment are already in motion. It tends to fail when the step gets skipped because you are trying to save five minutes, then you spend an hour fixing a scope change and re-explaining the why.

Continue your restoration technician training with Building Construction Identification

Next, once you can name what you are looking at, you can justify what you do next. That is the difference between a fast guess and a defensible decision when you are writing scope, talking to an adjuster, or explaining risk to a homeowner.

Connect the dots from what you see in the field to what you call on the job:

  • A moisture pattern at a baseboard to the assembly behind it, so drying and demo lines make sense

  • A smoke odor path to likely cavities, so your cleaning and sealing plan matches the building

  • A suspect growth area to substrate type, so containment and removal choices are easier to defend

If you do one thing, do this: slow down for 60 seconds and identify the assembly, not just the surface. It works best when access is limited and time is tight, but it fails when you assume every wall is built the same.

To go further, explore RestoreTech 360’s Building Construction Identification continuing education so you can make faster, more accurate material calls across water, fire, and mold jobs.